In this section, we are going to talk about the WLED Config setting in depth.
If you are not familiar with WLED, you can find out more information in my previous Blog How to Install and Configure WLED on ESP8266 Controller. In this post, I was talking about WLED in general and how to install WLED Controller on ESP8266.
WLED web configurable settings are split into 6 sub-sections. The purpose of this post is to provide more clarity about the purpose of each setting. If you are willing to study more in-depth about the setting, you should visit the official page of WLED Project webpage.

WiFi Settings
At the first glance, you should see your Network name and Password which has been set up before in the previous post, How to Install and Configure WLED on ESP8266 Controller. If your setup is required to have a Static IP address for your LED strip, then you need to make sure to set up a unique IP address in this section. Generally, your local network IP Address should be 192.168.XXX.XXX. The current IP Address of the ESP in the home network in this example is 192.168.1.127 which is shown below as Client IP. You are free to select any IP in the range of 192.168.1.1 to 192.168.1.255 as long as it has not been used by any other devices. The current IP of the ESP in the home network Static Gateway is your default gateway IP in your computer. Generally, it is known as your router IP address. you can find this IP Address by opening the Command prompt on Windows and typing 'ipconfig'. Make sure your Static Subnet Mask is the same as your device. Generally, it is 255.255.255.0

The next part is ESP Configure Access Point. AP SSID is the name of the ESPs internal WiFi hotspot. You have the option to hide the ESPs Access Point from other devices' WiFi lists by ticking the Hide AP name. Access Point WiFi channel is for the more advanced users to specify the 2.4G Wifi band of the AP. Users have the option to Disable WiFi Sleep to increase reliability in a connection however, the downside of this action is to increase the power consumption. This is critical for battery operated setup.

LED & Hardware Setup
This subsection is to set up the state of LED lights. The total LED Count is the section you determined how many LEDs you have in the WS2812B strip. The default value is 30, make sure you changed the value and don't panic if you couldn't see all your LEDs light up. Nothing wrong with your LED strips.


If you are concerned about the power supply cannot able to provide the required current, limit brightness to stay in a given current range which is provided as the Maximum Current. You need to specify the Voltage/type of LEDs. If you are using WS2812B it should be 5 Volts.

In the Timed light section, you can set up setting about the WLED timer function. The default duration is how long the nightlight should stay on in minutes and the value range is between 1 to 255. Target brightness is what brightness the light should be after time is over. The value range is between 0 to 255 which is zero equal to off. There are several modes you can choose from. the default option is to Fade down. This mode allows the LEDs to gradually fades down the light over the duration instead of turning it off at the end.
Palette blending: Choose how the palette wraps at the end (seam)
Reverse LED order: Mirrors the LEDs (last LED is first)
Skip first LED: Will turn off the first LED and shift the remaining by 1 (1st LED used as a signal repeater)

User Interface
In the Web Setup, you can enter the name you'd like to be shown on the top of the UI in the Server Description. Then, the app will display the device name that you have selected instead of the default WLED for every device.
The setting under Color Selection methods and UI Appearance are self-explanatory. If you want to have more fun, enable Random BG image. It changes the WLED UI background every few seconds. You can also control background opacity on the same page. In this section, you can set up the WLED UI as you wish to look.

Sync Interfaces
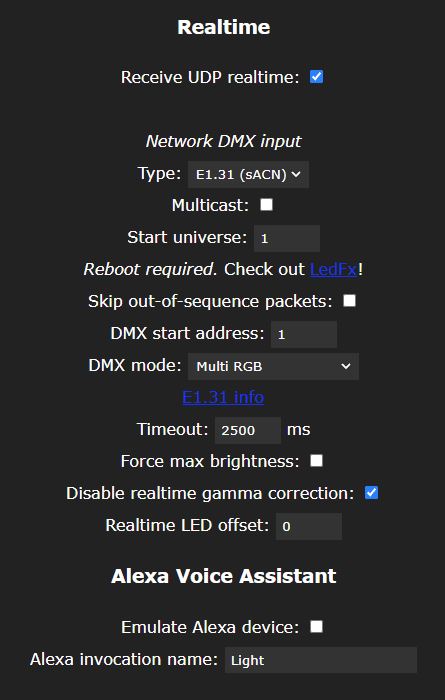
In the Sync Setup, you can configure external software synchronization interfaces to your WLED controller. The On/Off button is going to check if a physical button is connected to GPIO0 of the controller. If you want to have remote control over the WLED, in the infrared remote section you can select the receiver type. Find more information about this part from Hyperlink "IR info". WLED UDF function makes it simple to synchronize several lights to the same colour and effect. The UDP notifier function of WLED makes it easy to sync multiple lights to the same colour/effect, enabled by default. All WLED lights you want to group together must have the same port. Read more about the setting on the offical webpage guidelines.

With WLED you have several options to control and sync your controllers such as Blynk, MQTT and Philips Hue and Websocket
https://kno.wled.ge/interfaces/mqtt/


You are able to set custom actions ("Macros") in Time & Macro settings for the following events: You are able to set custom actions ("Macros") in Time & Macro settings for the following events:
- Specific time of day
- Button short/long/double press
- HTTP API call executing a macro with &M=
- Alexa On/Off
- Countdown over
- Timed light duration over
You can used Time-controlled your presets based on hours and weekly. Please note that you can only set eight presets only

At last, in the Security and Update setup, you can keep your WLED up to date or perform factory reset in case something went worng. You have options to perfomr software update automatically or manual. in the manual option, you can do that Over The Air(OTA) through downloading the binary file from the website. You can also setup the Lock for your OTA and setup a password.

Comments
Post a Comment